Loading Dock Camera Features That Protect Shipments
November 6, 2026
Troubleshooting Common Home Security Connectivity Issues
November 8, 2026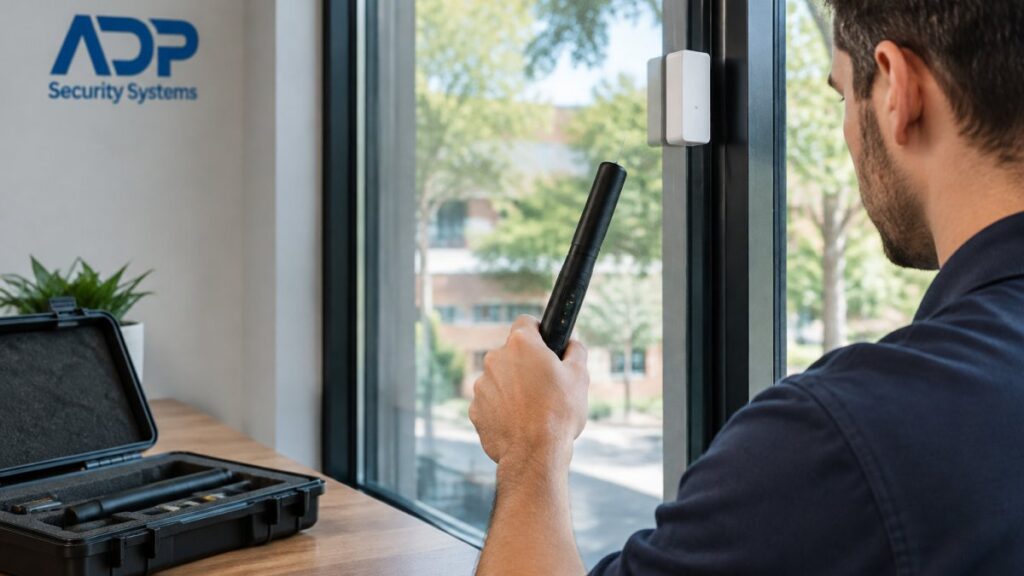
Last Updated: November 6, 2026
Quick Summary
Test glass break sensors with a manufacturer-approved simulator that plays the impact-plus-shatter sound, after putting your panel in test mode and calling the monitoring station. Point the simulator toward the protected window from within the rated coverage range, then confirm the signal reached the panel and the station. Never test with real breaking glass.
- Put your alarm panel in test mode and call the monitoring station with a start and end time before testing.
- Point the simulator toward the protected window, not directly at the detector, and hold it within the rated coverage range.
- A sensor that responds at close range but misses the far corner has a coverage problem, not a sensor failure.
- A weak battery is the most overlooked cause of a failed glass break sensor test.
- Test every detector once a year and after any renovation, window replacement, or battery change.
Table of Contents
- Why Testing Glass Break Sensors Matters More Than You Think
- Put Your Alarm System in Test Mode Before You Start
- What the Glass Break Sensor Test Sound Actually Simulates
- Using a Glass Break Simulator Step by Step
- Testing Without a Simulator: Sound Clips, Clapping, and Other Methods
- How to Run a SimpliSafe Test Glass Break Sensor Check
- Ring Glass Break Sensor Battery Replacement and What It Means for Testing
- Schedule a Professional Security Assessment
- Frequently Asked Questions
Why Testing Glass Break Sensors Matters More Than You Think
Glass break sensors are devices that listen for the specific sound frequencies produced when glass shatters, then send a signal to your alarm panel. It is one of the few sensors that can catch a break-in before an intruder is fully inside your home.
That makes testing them essential. A dead microphone or a drifted sensitivity setting leaves a window unprotected, and you would never know until it matters. A quiet sensor is one of the most common failures a glass break detector can develop.
Below, we walk through every method, from a professional simulator to a simple hand clap. If you want the wider picture on testing every device in your system, our guide on how to test home security sensors covers the full routine.
Watch out: never test with real breaking glass. You can cut yourself, and the sound may trigger a genuine alarm dispatch.
Put Your Alarm System in Test Mode Before You Start
Test mode is a temporary setting that stops your panel from sending alarm signals to the monitoring center while you work. Skipping this step is the fastest way to send police to your own front door.
Here is a common sequence for entering test mode:
- Open your control panel and enter your master code.
- Find the device or system menu and select test mode.
- Confirm the panel shows a test or disarmed state.
- Call your monitoring station and tell them you are testing.
- Give them a start and end time.
The call matters as much as the setting. Many panels still log alarm events during testing, and a monitoring center that is not expecting activity may respond anyway. When you finish, exit test mode and call back to confirm the system is live.
What the Glass Break Sensor Test Sound Actually Simulates
A glass break detector listens for two things: the low thud of impact and the high-pitched shatter that follows. A good test stimulus reproduces both parts of that acoustic signal.
The shatter sound sits in a specific frequency range, and the detector’s microphone is tuned to hear it. That is why a random noise often fails to trigger the device while a proper glass-breaking sound clip works every time.
Different models handle this differently. Some use a single microphone with a fixed frequency filter. Others use dual microphones and compare timing between them to rule out false alarms from televisions or dishes clattering.
The key point: a test stimulus must sound like breaking glass, not just loud. A door slam or a dropped pan may not register at all, even on a healthy sensor.
Using a Glass Break Simulator Step by Step
A glass break simulator is a handheld tester that plays a recorded shatter sound at a controlled volume. It is the most reliable method, and it is what our technicians use on every service visit.
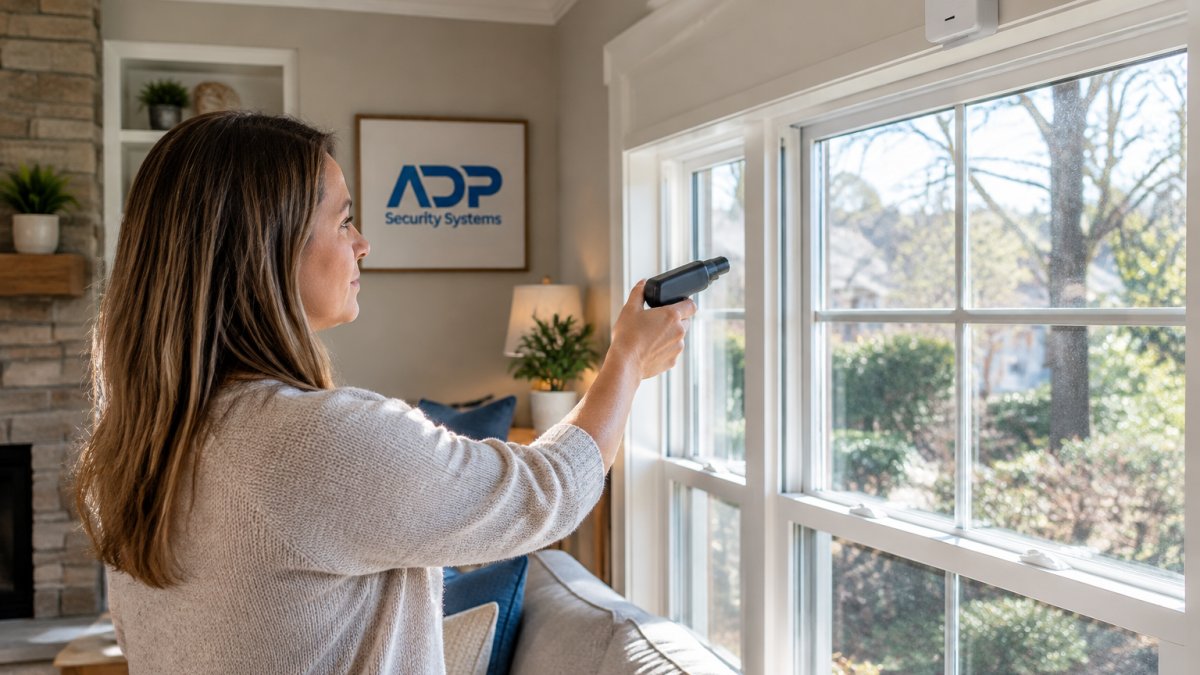
Before you point the simulator anywhere:
- Put the panel in test mode and confirm the display shows the test or disarmed state.
- Call the monitoring station, give them your account number, and state a start and end time for the test.
- Confirm the sensor’s battery is fresh and the device is not showing a trouble or tamper condition.
- Locate the detector’s coverage pattern in the manual. Glass break detectors are typically rated for a set radius, so check the manual for the rated range of your model, with a clear line of sight to the protected glass.
Run the test in this order:
- Hold the simulator within the rated coverage range of the sensor, usually a few feet away to start.
- Point it toward the protected window, not directly at the detector. The detector is tuned to the sound of glass, not to a speaker cone.
- Press the test button and hold for a few seconds so the full impact-plus-shatter pattern plays.
- Watch the sensor status light or the panel display for a trigger. Note which one responded.
- Move to the far edge of the window and repeat. Then test from the corner of the room at the outer edge of the rated range.
- Test each window the sensor is meant to cover, one at a time, and write down the result for each.
If the detector responds at close range but not at the far corner, you have a coverage problem, not a sensor failure. Repositioning the device usually fixes it.
Verify the full alarm path, not just the light. A sensor LED or a panel zone indication proves the detector activated.
Match the stimulus to the model. Manufacturer-approved simulators are built to reproduce the acoustic profile a specific detector expects.
Watch out: do not hold the simulator against the detector or crank the volume to force a trigger. Overdriving the microphone can produce a pass on a marginal unit and mask a real coverage or sensitivity problem.
Testing Without a Simulator: Sound Clips, Clapping, and Other Methods
No simulator on hand? You have options, but they are not interchangeable, and the biggest mistake is judging a sensor by a method it was never designed to hear. A detector that ignores clapping is often working exactly as intended.
Why improvised sounds fail. A glass break detector listens for two things: the low thud of impact and the high-pitched shatter that follows, and it filters for that two-stage pattern in a specific frequency range. A door slam, a dropped pan, or a hand clap may be loud enough to hear across the room but will not reproduce the impact-then-shatter sequence the detector is tuned to recognize. Loud is not the same as correct.
Compare the methods by reliability:
- Manufacturer-approved simulator: Highest reliability. Built to the detector’s expected acoustic profile and the method most installation manuals specify. Use this when the manual names a tester.
- Glass-breaking sound clip played through a speaker: The best DIY method, because a good recording carries the frequency profile of real shatter. Reliability depends on the recording quality, speaker volume, and distance. Play it at a realistic level from the same position a window would occupy, not pressed against the detector.
- Clapping: Sharp, loud claps close to the detector can trigger some sensitive models. It fails on well-tuned units, so a no-trigger result tells you little. A trigger tells you the microphone works but says nothing about whether the detector would catch real glass.
- Keys jingling: The metallic rattle sometimes mimics glass. Results are inconsistent and vary by model.
- Finger snapping or whistling: These rarely trigger a properly set detector. If they do, your sensitivity is likely too high.
- Broom handle tap on the frame: Tests the impact sensor on dual-technology units, not the glass-break element. Do not count it as a glass break test.
How to read a false negative. If an improvised sound fails but the sensor is otherwise healthy, do not immediately raise sensitivity. First confirm the sensor is in its rated range, has a clear line of sight to the glass, is not behind heavy curtains, and has a fresh battery.
Safe test boundaries. Never test with real breaking glass. You can cut yourself, and the sound may trigger a genuine alarm dispatch. Avoid unapproved loud sounds near the detector, especially sustained noise that can desensitize the microphone or log nuisance events.
When to stop DIY testing. If two different proper stimuli fail at close range, or if the sensor triggers randomly with no sound, stop testing and treat it as a service issue. Repeated false triggers often trace to placement near an air vent, a speaker, or a door that slams, and moving the device is usually the fix.
How to Run a SimpliSafe Test Glass Break Sensor Check
SimpliSafe units follow the same logic but use their own test routine.
If nothing registers, check the sensor’s battery and its placement. A detector mounted too far from the window glass, or behind heavy curtains, can struggle to hear a shatter.
Ring Glass Break Sensor Battery Replacement and What It Means for Testing
A weak battery is the most overlooked cause of a failed test.
Here is how to interpret common results:
| Test Result | Likely Cause | What to Do |
|---|---|---|
| No response at any range | Dead battery or failed unit | Replace battery, retest, then replace sensor |
| Responds close, misses far corner | Coverage gap | Reposition or add a second detector |
| Triggers on clapping or TV noise | Sensitivity too high | Lower sensitivity in device menu |
| Triggers randomly with no sound | Placement near air vent or speaker | Move the device |
Watch out: do not crank sensitivity up to force a pass. That trades a missed alarm for a stream of false alarms, and repeated false alarms erode trust in your whole system.
Test every detector once a year, and after any renovation, window replacement, or battery change. Log the date and result so you can spot a device that keeps failing.
Schedule a Professional Security Assessment
Testing tells you whether a sensor works today. It does not tell you whether your coverage is right for your home, and that gap is where most security plans quietly fall short.
If your detectors are aging, if you have added windows or rooms, or if you have never had the system reviewed, a professional assessment can close that gap. ADP Security Systems offers installation, 24/7 alarm monitoring, and customizable maintenance schedules, so your devices can be checked on a routine basis. You can also read up on why professional alarm monitoring matters before you decide, or compare the best professionally installed home security systems to see what a full setup looks like.
Get started with ADP Security Systems and put a real testing and maintenance routine behind every window in your home.
Frequently Asked Questions
Can you test a glass break sensor without breaking glass?
Yes. A glass break simulator plays a recording of the exact sound frequency a window makes when it shatters, and most detectors respond to that clip the same way they would to real breaking glass. You can also use a manufacturer sound clip through a phone speaker or a short, sharp clap near the protected window. None of these methods require you to damage a window, and all of them let you confirm the detector is listening.
What can trigger a glass break sensor by accident?
Glass break sensors listen for a specific two-stage acoustic signal: a low-frequency thud followed by a high-pitched shatter. Loud clapping, dropped keys, whistling, a broom handle tapping the floor, or a dog barking sharply can occasionally mimic that pattern. Placement matters here. Mounting the detector away from air vents, kitchens, and rooms with hard reflective surfaces reduces false alarms, and a sensitivity adjustment on the device menu can tune out background noise.
How far away do glass break sensors work?
Most models cover a radius of roughly 20 to 25 feet with a clear line of sight to the protected window, though vaulted ceilings, heavy curtains, and thick furniture can shorten that range. During a test, hold the simulator or sound source at the far edge of the coverage zone to confirm the detector responds from the worst-case position. If it misses the sound there, reposition the sensor closer to the glass or adjust sensitivity.
What should you do if a glass break sensor does not respond during a test?
Start with the basics: confirm the sensor is enrolled in the control panel, check the battery if it is wireless, and make sure the system is in test mode rather than disarmed. Then repeat the test with a fresh sound clip held closer to the detector. If it still does not trigger, the sensor may have a sensitivity issue or a failed microphone, and a technician should inspect it. Document the failed test so the follow-up visit is easy to schedule.