7 Steps to Planning a Fire Alarm System Retrofit
October 25, 2026
Fire Inspection Schedule: A Practical Plan
October 27, 2026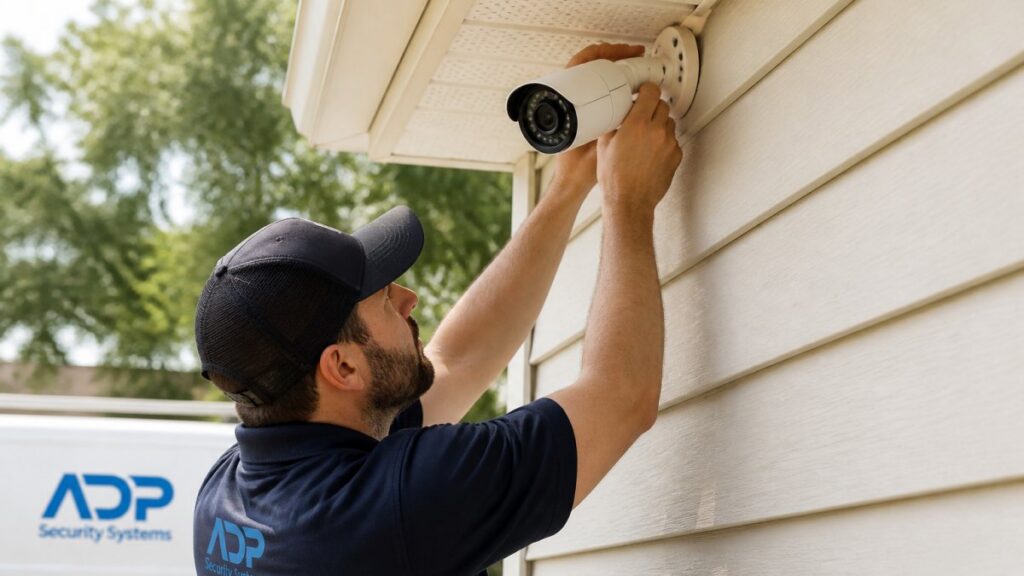
Last Updated: October 25, 2026
Quick Summary
Outdoor security camera mounting starts with planning your property zones and identifying entry points, then positioning cameras 8 to 10 feet high at a 20 to 30 degree downward angle to capture faces clearly. The best mounting technique depends on your coverage goals, available surfaces, and whether you’re using wired or battery power.
- Mount cameras 7 to 9 feet high at doors and 10 to 12 feet high at driveways for optimal facial identification and vehicle coverage.
- Use wall mounts with 3/8-inch bolts for wood or expansion bolts for brick and stucco as the most reliable mounting option.
- Magnetic mounts and adhesive strips offer no-drill alternatives for renters, though drilling and bolting provides better long-term security.
- Test your camera’s Wi-Fi signal strength at the mounting location, aiming for -50 dBm or stronger for reliable connectivity.
- Walk your property at different times to identify obstructions like trees and shrubs that could block your camera’s view.
Table of Contents
- Planning Your Outdoor Security Camera Mounting Strategy
- Choosing Entry Points and Coverage Zones for Outdoor Security Camera Placement
- Security Camera Mounting Height and Angle
- Selecting Security Camera Mounting Brackets and Surfaces
- How to Mount a Security Camera Without Drilling
- Weatherproofing, Power, and Connectivity at Your Mounting Point
- Avoiding Obstructions and Testing Your Coverage
- Getting Professional Installation and Ongoing Support
- Frequently Asked Questions
Planning Your Outdoor Security Camera Mounting Strategy
The best outdoor security camera mounting techniques start with a clear plan.
Think of your property as a series of zones. Each zone has different security needs.
Walk your property at different times of day, noting where light hits, where shadows fall, and where someone could approach unseen.
The mounting techniques that work best depend on what you’re trying to see.
Choosing Entry Points and Coverage Zones for Outdoor Security Camera Placement
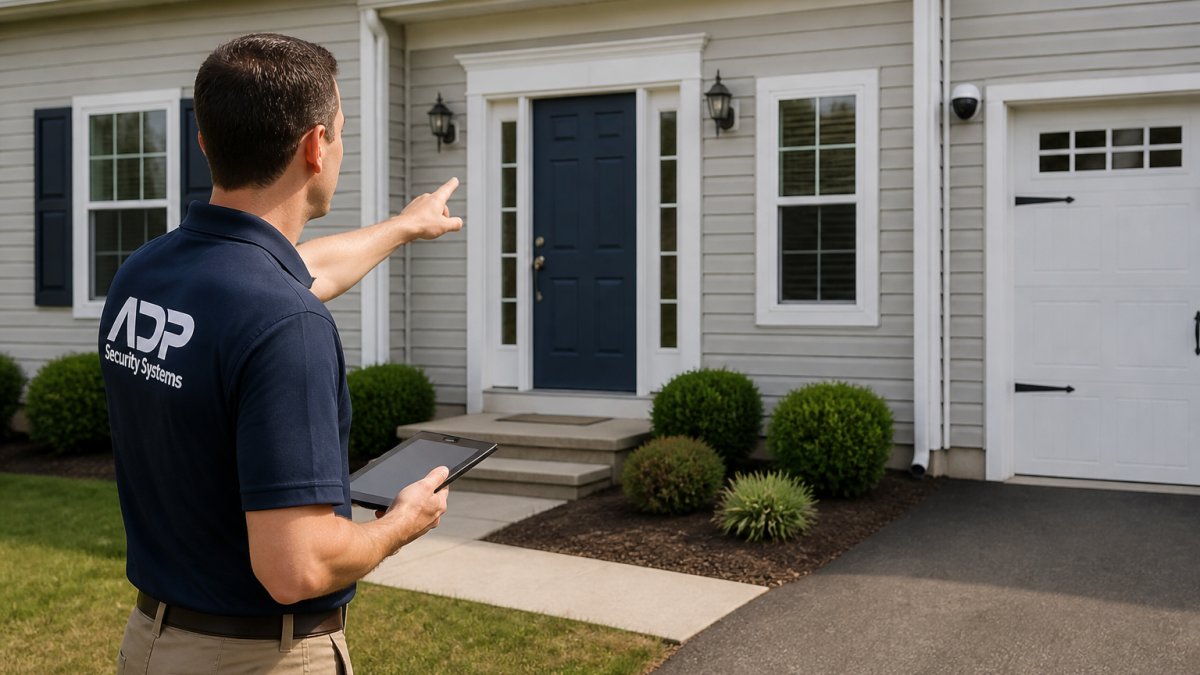
The most important security cameras monitor entry points. These are places where someone can access your property: doors, windows, gates, and driveways. Start here. Everything else is secondary.
Doors, Windows, and Ground-Floor Entry Points
Your front door is your first priority, the most common entry point for both legitimate visitors and intruders.
Side doors and ground-floor windows come next, less obvious entry points attract people with bad intentions.
Back doors matter too. They’re often more secluded, which is exactly why they’re targets.
Driveways and Perimeter Coverage
Your driveway is a security zone on its own.
Perimeter coverage means seeing people before they reach your house.
Corners of your property are often overlooked, they’re where someone could move between zones unseen. A camera at each back corner, mounted 8 to 10 feet high, eliminates these blind spots entirely.
Corners and Wide-Angle Views
Corners give you the widest field of view with a single camera, covering two sides of your property at once. Mount it at the highest point allowed by your mounting surface, typically 10 to 12 feet high.
Wide-angle coverage is powerful but has limits: the wider the view, the smaller distant objects appear, and a face 30 feet away becomes hard to identify. Balance wide coverage with detail where it matters most.
Security Camera Mounting Height and Angle
Height and angle determine what your camera can see and how clearly. Get them wrong and you’ll have great footage of the sky or the ground; get them right and you’ll capture exactly what you need.
Standard Height Guidelines
The standard outdoor security camera mounting height is 8 to 10 feet for residential properties, high enough to see over most obstacles and avoid tampering, low enough to capture facial details.
For commercial properties with higher ceilings or larger spaces, 12 to 14 feet is common, the same principle applies.
Doors need different thinking. Mount door cameras 7 to 9 feet high, angled downward about 20 degrees, to capture faces without tilting too steeply.
Adjusting Angle for Face Identification and Motion Detection
Angle is where most people go wrong. Pointed straight ahead, a camera captures the horizon; angled too steeply, mostly ground.
For face identification, angle matters enormously.
Motion detection is more forgiving, but even then avoid pointing straight down or straight ahead.
Test your angle before finalizing the mount.
Selecting Security Camera Mounting Brackets and Surfaces
The bracket you choose determines how securely your camera stays mounted and how adjustable it is. Different surfaces require different brackets. Understanding your options prevents costly mistakes.
Wall Mount and Bracket Options
Wall mounts are the most common choice for residential properties, simple, reliable, and secure.
Standard wall mounts bolt or screw directly to your house and work on wood, brick, and vinyl siding.
Heavy-duty brackets are worth the extra cost for larger cameras or harsh weather.
Pole Mount and Alternative Mounting Surfaces
A pole mount bracket wraps around the pole and uses tightening bands or bolts to secure it.
Soffit and gutter mounting is another option. Your soffit is the horizontal surface under your roof overhang.
Soffit mounts typically use brackets that attach to the soffit with bolts or adhesive strips.
Renter-Friendly and No-Drill Solutions
Renters and people who don’t want to drill holes have options.
Adhesive mounting strips provide another no-drill option. Heavy-duty adhesive strips can hold cameras weighing up to 5 pounds.
Suction cup mounts work on smooth glass or plastic surfaces.
The trade-off with no-drill solutions is security.
How to Mount a Security Camera Without Drilling
Many people avoid drilling because they don’t have the tools, they’re renting, or they want to avoid damaging their property. Wireless security camera installation guidance covers detailed setup steps for no-drill mounting options. You have several effective options that require no drilling.
Magnetic and Adhesive Mounting Options
Magnetic mounts work on any metal surface. Your gutter is likely metal. Metal roof flashing is metal.
To use a magnetic mount:
- Clean the metal surface with a dry cloth to remove dust and debris
- Position the magnetic bracket where you want the camera
- Press it firmly against the metal for 10 seconds
- Attach your camera to the bracket
- Test the stability by gently pushing the camera
The entire process takes 5 minutes. If you need to reposition it, pull it off and move it. No tools required.
Adhesive mounting strips are permanent but effective. They work on siding, stucco, brick, or any smooth surface.
To use adhesive strips:
- Clean the mounting surface thoroughly with rubbing alcohol
- Let it dry completely (at least 15 minutes)
- Remove the backing from the adhesive strip
- Press the strip firmly to the surface for 30 seconds
- Wait 24 hours before attaching your camera
- Attach the bracket and camera
The 24-hour wait is important. The adhesive needs time to set fully.
Gutter and Soffit Mounting
Gutters and soffits are excellent mounting surfaces because they’re already high on your house.
Get a Free Security Assessment →
Gutter mounting uses brackets that clamp to your gutter:
- Choose a spot on your gutter that has a clear view of the zone you want to monitor
- Position the gutter clamp bracket on the gutter
- Tighten the clamp bolts until the bracket is secure
- Attach your camera to the bracket
- Route power cables along the gutter toward your electrical outlet
Test the tightness by pulling on the bracket. It shouldn’t move or rotate. If it does, tighten the bolts more.
Soffit mounting is similar but uses different brackets:
- Find a soffit location with good sightlines
- Attach the soffit bracket using adhesive strips or by bolting through the soffit into the fascia board behind it
- Attach your camera to the bracket
- Route power cables down the side of your house toward an outlet
Both methods work well for wireless cameras. If you’re using a wired camera, plan your power cable route before you install the bracket.
Weatherproofing, Power, and Connectivity at Your Mounting Point
Outdoor cameras face harsh conditions. Sun, rain, wind, and temperature swings all take a toll. Your mounting point needs to protect your camera and support its power and connectivity needs.
Weather Resistance and Rain Exposure Protection
Your camera itself has a weatherproof rating.
But weatherproofing your camera isn’t just about the camera itself. It’s about the mounting point.
Route power cables along the edge of your gutter or down the side of your house.
Position your camera so the lens isn’t facing into the sun during peak hours.
Check your mounting point after heavy rain.
Wired Versus Battery-Powered Mounting Trade-Offs
Wired cameras run on power from your house. Battery-powered cameras run on built-in batteries.
Wired cameras need access to an electrical outlet.
Battery-powered cameras are more flexible. You can mount them anywhere without worrying about power cables.
Consider your willingness to maintain batteries when choosing a mounting location.
Testing Wi-Fi Signal and Cable Routing
Wireless cameras need a strong Wi-Fi signal. A weak signal causes dropped footage or slow uploads. Before you finalize your mounting point, test the signal strength at that location.
Use your phone’s Wi-Fi analyzer app to check signal strength:
- Stand at your intended camera location
- Open your Wi-Fi analyzer app
- Look for your home network’s signal strength
- It should show -50 dBm or stronger (closer to 0 is better)
- If it’s weaker than -70 dBm, move your router or choose a different camera location
Wired cameras don’t have Wi-Fi concerns, but they do need cable routing. Plan your cable path before you install the bracket:
- Identify the shortest path from your camera to your indoor equipment
- Avoid running cables across walkways where people trip on them
- Use cable clips or conduit to protect cables from weather and damage
- Keep cables away from power lines or other electrical hazards
- If you must run cables underground, use conduit rated for burial
Test your cable routing with a temporary setup before you permanently mount the camera. Make sure cables reach and that you can access them for maintenance.
Avoiding Obstructions and Testing Your Coverage
The best-mounted camera is useless if something blocks its view. Obstructions are the most common reason outdoor cameras fail to capture useful footage.
Identifying and Eliminating Blind Spots
Trees are the biggest culprit. A tree that’s small in winter grows leaves in spring.
Shrubs and bushes grow over time. What’s clear today might be overgrown in two years.
Utility boxes, air conditioning units, and other equipment often sit in strategic locations.
Parked cars are temporary obstructions.
Night Vision, Glare, and Lighting Placement
Night vision requires infrared light. Learn how cameras work at night to understand infrared performance, lighting placement, and sensor capabilities for your mounting location.
Shiny surfaces like windows, metal, or wet pavement reflect infrared light back at the camera.
Artificial lighting affects night vision too.
Darkness isn’t the only challenge. Backlighting during dusk and dawn creates problems.
Consider adding motion-activated lights near your camera mounting point. These lights turn on when motion is detected.
Post-Installation Coverage Testing
After you mount your camera, test its coverage before you declare it complete. This takes 30 minutes and prevents problems later.
Test during the day first:
- Have someone walk through the zone you’re monitoring
- Watch the live feed on your phone or monitor
- Note any blind spots where the person disappears from view
- Verify you can see their face clearly
- Check that motion detection triggers when they enter the frame
Test at night:
- Turn off outdoor lights if possible
- Have someone walk through the zone again
- Verify night vision captures their face clearly
- Look for glare or washout in the infrared
- Confirm motion detection still works
Test in different weather:
- Check the camera after rain to ensure water isn’t pooling around it
- Verify the image quality isn’t degraded by moisture or condensation
- Test on a sunny day to ensure glare isn’t a problem
- Check the image at dawn and dusk when lighting is poor
If any test reveals problems, adjust your camera angle or position. It’s much easier to fix now than after you’ve finished installation.
| Test Type | What to Check | Expected Result |
|---|---|---|
| Daytime coverage | Person walks through zone | Face visible, motion detected |
| Nighttime coverage | Person walks through zone in darkness | Face visible in night vision, no glare |
| Weather | Camera after rain | No water pooling, image clear |
| Lighting | Sunset/sunrise | No backlighting washout |
| Motion detection | Movement in frame | Alert triggers within 2 seconds |
Getting Professional Installation and Ongoing Support
DIY mounting works for many people. But some situations benefit from professional installation. Knowing when to call an expert saves time and prevents mistakes.
Professional installers have equipment you might not own: ladders tall enough for safe high-mounting, power tools for drilling through brick, and experience with unusual surfaces.
We assess your property, recommend optimal camera locations, and handle all installation work. We also provide professional security system installation services guide for customers ready to upgrade their entire system.
After installation, ongoing support matters. Your camera needs occasional maintenance: cleaning the lens, checking cable connections, updating firmware.
Frequently Asked Questions
What is the best height to mount an outdoor security camera?
Mount outdoor cameras between 8 and 12 feet high for optimal coverage. This height balances face identification with a wide field of view and makes tampering difficult. Adjust based on your specific entry points: mount slightly lower (6-8 feet) if you want to capture facial details at doors, and higher (10-12 feet) for driveway and perimeter coverage. Test the angle after installation to confirm you’re capturing the detection zone you need.
How do you mount a security camera without drilling into walls?
Use magnetic mounts on metal surfaces, adhesive strips rated for outdoor use, or gutter/soffit mounts that clamp to existing structures. Magnetic connectors work well on metal gutters or poles and require no fastening. Adhesive mounts suit smooth surfaces like stucco or vinyl siding but must be rated for UV exposure and temperature swings. For rental properties or temporary setups, gutter mounts offer secure fastening without drilling. Verify your chosen method can support your camera’s weight in wind.
Where should you avoid placing outdoor security cameras?
Avoid mounting cameras where trees, eaves, or structures create obstructions that block your line of sight to entry points. Do not place cameras directly facing bright lights or windows, as glare will wash out footage and prevent face identification. Avoid corners that create blind spots instead of coverage. Do not mount cameras where they point at your neighbor’s windows, as this raises privacy concerns. Test each location’s Wi-Fi signal strength before final installation to ensure reliable connectivity.
What mounting bracket type works best for different surfaces?
Wall mounts with adjustable brackets suit brick, stucco, and vinyl siding and allow fine-tuning of camera angle. Pole mounts work for free-standing installations on posts or trees and provide height flexibility. For eaves and gutters, use brackets designed to clamp without drilling. Choose brackets rated for your climate’s UV exposure and temperature range to prevent material degradation. Verify the bracket can support your camera’s weight and withstand wind pressure at your intended height.
The best outdoor security camera mounting techniques combine careful planning with proper execution. Start by identifying your property’s entry points and vulnerabilities. Choose mounting heights and angles that capture faces and motion. Select brackets and surfaces appropriate for your situation. Weatherproof your installation and test your coverage thoroughly. When you follow these steps, your cameras protect what matters most.